 Save Pin
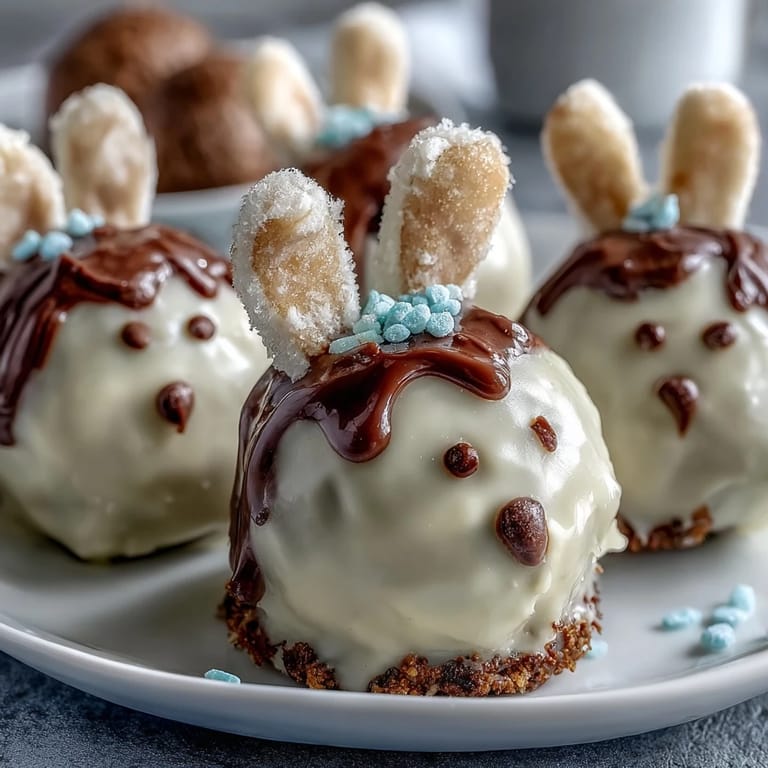
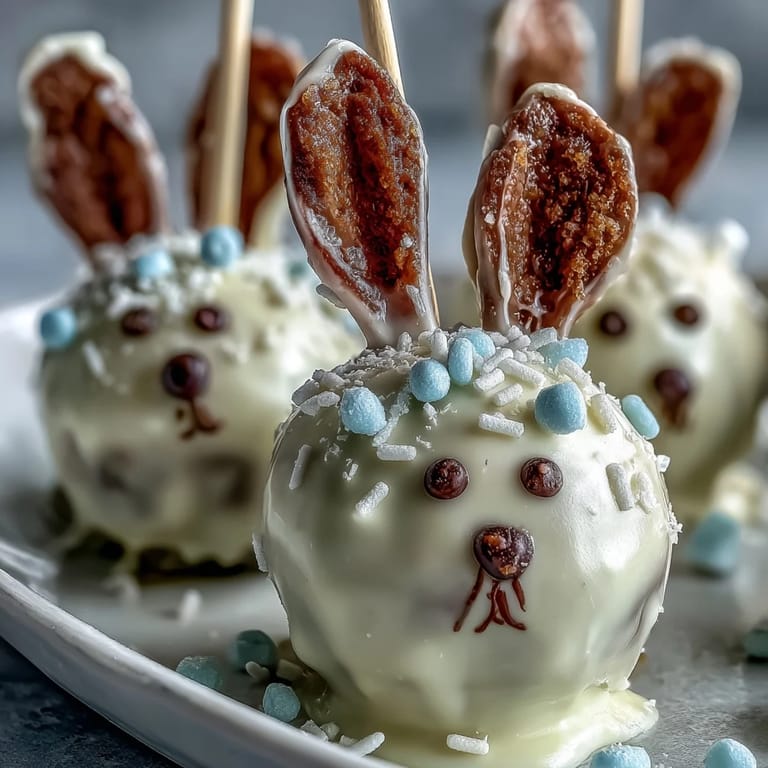
 My daughter came home from school with a flyer about the Easter bake sale, and I watched her eyes light up at the photo of bunny-shaped treats. That afternoon, we stood in the kitchen together, and I realized I'd never made cake pops before—just another thing I'd convinced myself was too fiddly. Turns out, they're not fiddly at all, just a little playful. Now they're her favorite thing I make for spring, and honestly, mine too.
Last spring, I made these for a neighborhood Easter gathering, and watching people's faces when they realized the bunny ears were actually edible chocolate was worth every minute of dipping and decorating. Someone's grandmother asked for the recipe, and that's when I knew they weren't just cute—they were legitimately delicious.
Ingredients
- Vanilla or funfetti cake mix (1 box, about 400g): A box mix here isn't cheating; it's being smart about your time and guaranteeing a tender crumb.
- Eggs, oil, and water: Whatever the box asks for—these are your cake foundation, so don't skip or substitute randomly.
- Cream cheese (100g, softened): This is what makes the frosting stick together beautifully when mixed with the cake crumbles; the tanginess matters too.
- Unsalted butter (60g, softened): Softened is key here, or you'll be fighting lumps in your frosting.
- Powdered sugar (120g): The glue that holds everything together without making the mixture too wet.
- Vanilla extract (1/2 tsp): A small amount goes a long way and keeps everything tasting spring-fresh.
- White chocolate melting wafers (400g): These are easier than chopped chocolate and melt more smoothly for dipping.
- Lollipop sticks (24): The structure that makes these feel special rather than just balls.
- Pink candy melts or colored chocolate: These harden quickly and are perfect for bunny ears and noses.
- Edible black food marker or melted dark chocolate: The eyes and whiskers bring the whole bunny to life.
- Mini marshmallows (optional): A tiny fluffy tail that actually works perfectly for this.
- Rainbow sprinkles or pastel confetti (optional): The fun finishing touch that makes them feel festive.
Tired of Takeout? 🥡
Get 10 meals you can make faster than delivery arrives. Seriously.
One email. No spam. Unsubscribe anytime.
Instructions
- Bake and cool the cake:
- Follow the box directions and let the cake cool completely—I usually do this the night before if I'm making these for an event. Warm cake and frosting together equals a mushy mess.
- Make the frosting:
- Beat the softened cream cheese, butter, powdered sugar, and vanilla until it's smooth and creamy, about 2 minutes. You want zero lumps here.
- Combine cake and frosting:
- Crumble the cooled cake into a large bowl and gradually mix in the frosting, using your hands once it gets thick. The mixture should be moist enough to hold together but not wet; if it's too soft, refrigerate it for 15 minutes.
- Roll the bunny heads:
- Scoop even portions (about the size of a walnut) and roll into balls, then gently shape each into a slight oval. The oval shape is what makes them look bunny-like rather than just round.
- Freeze for stability:
- Spread the cake balls on a parchment-lined baking sheet and freeze for 20 minutes—cold cake pops don't fall off the stick, and that matters more than you'd think.
- Prepare your dipping station:
- Melt the white chocolate wafers according to package directions, usually in a microwave in 30-second bursts, stirring between each. Set up a styrofoam block or cake pop stand nearby.
- Secure the sticks:
- Dip the tip of each lollipop stick into the melted white chocolate, then push it halfway into a frozen cake ball. This chocolate acts like glue and prevents the stick from spinning.
- Dip into white chocolate:
- Holding the stick, gently dip the entire cake pop into the melted white chocolate, then give the stick a slow twist and gently tap off the excess. The coating should be smooth and not too thick.
- Set and decorate:
- Stand each pop upright in your styrofoam block to set, then while the coating is still slightly tacky, add pink candy melts for ears and a tiny piece of marshmallow for the tail. The sticky coating helps everything adhere.
- Add the face:
- Once the white coating is fully set, use your edible marker or a tiny brush with melted dark chocolate to draw eyes and whiskers. A small dot of pink adds the perfect bunny nose.
- Final touches:
- Add sprinkles or confetti if you like, then let everything set completely before serving or storing.
 Save Pin
 There's something almost meditative about standing at the stove, dipping bunny after bunny into white chocolate, watching them transform from plain cake balls into something that actually looks intentional. When my daughter added the whiskers with the black marker, she was so careful and concentrated—like she was creating something real, and in that moment, we both understood she was.
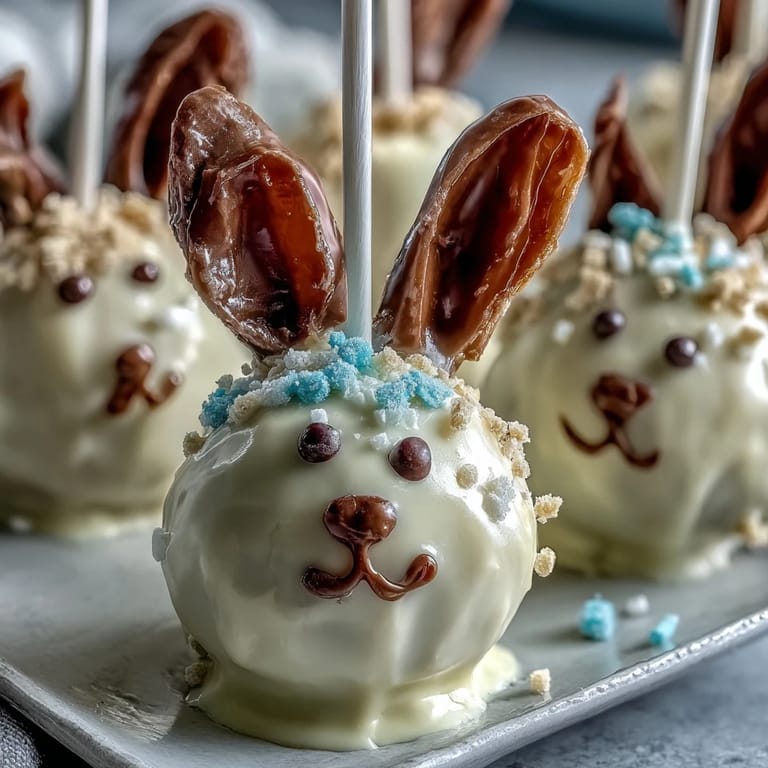
Making Perfect Ears That Actually Stick
Pink ears are what make these look unmistakably like bunnies, and here's what I've learned: you can cut small ear shapes from hardened pink candy melts, or you can pipe them freehand onto wax paper, let them set, and peel them off. The piped versions look more intentional, but the cut shapes are honestly faster and they stick just fine if you press them into the white chocolate coating while it's still slightly wet. Either way, two ears per bunny, and they should be roughly the same size or the whole thing looks lopsided.
Storing These So They Stay Fresh
I've learned that cake pops actually keep beautifully in an airtight container in the refrigerator for up to four days, and they stay fresher longer than you'd expect. If you're making them ahead for an event, this is genuinely helpful—you can decorate them the night before and just pull them out an hour before serving. Just keep them cold until the last moment; they soften quickly at room temperature.
Variations and Ways to Make Them Your Own
The base of these is so forgiving that you can really play around. Different cake flavors work beautifully—chocolate cake pops with white coating, or funfetti with pastel sprinkles, or even a lemon cake if that's what you love. You could use milk chocolate instead of white chocolate, experiment with different candy colors, or skip the marshmallow tails and use something else entirely. The magic isn't in following every detail exactly; it's in the process of making something with your hands and watching it come together.
- Gluten-free bakers can swap in a gluten-free cake mix and ensure all decorations are labeled gluten-free.
- If you don't have a styrofoam block, a tall glass filled with dried beans or a small box with holes poked in the top works just as well for setting.
- These freeze beautifully before the final decorating step, so you can make the cake pops one day and dress them up the next.
 Save Pin
 These little bunnies have become part of our spring tradition, and they're proof that something fun and impressive doesn't need to be complicated. I hope your kitchen fills with the same joy that ours does when these come together.
Recipe FAQs
- → How do I shape the cake pops into bunny heads?
Roll the moistened cake mixture into balls, then gently shape each into an oval to resemble a bunny head before chilling.
- → What is the best way to coat the pops with white chocolate?
Melt the white chocolate wafers thoroughly, dip each cake pop completely, and gently tap off excess before setting upright to harden.
- → How can I make bunny ears for decoration?
Cut or pipe pink candy melts into ear shapes, let them harden, then attach to the dipped pops before the coating fully sets.
- → Can these pops be stored ahead of time?
Yes, store the finished pops in an airtight container in the refrigerator for up to four days to maintain freshness.
- → Are there alternatives for gluten-free needs?
Use a gluten-free cake mix and ensure all decoration ingredients are gluten-free to accommodate dietary restrictions.
- → What tools are needed to assemble these treats?
A mixing bowl, electric mixer, baking sheet, parchment paper, lollipop sticks, microwave-safe bowl for melting, and edible food markers are essential.