 Save Pin
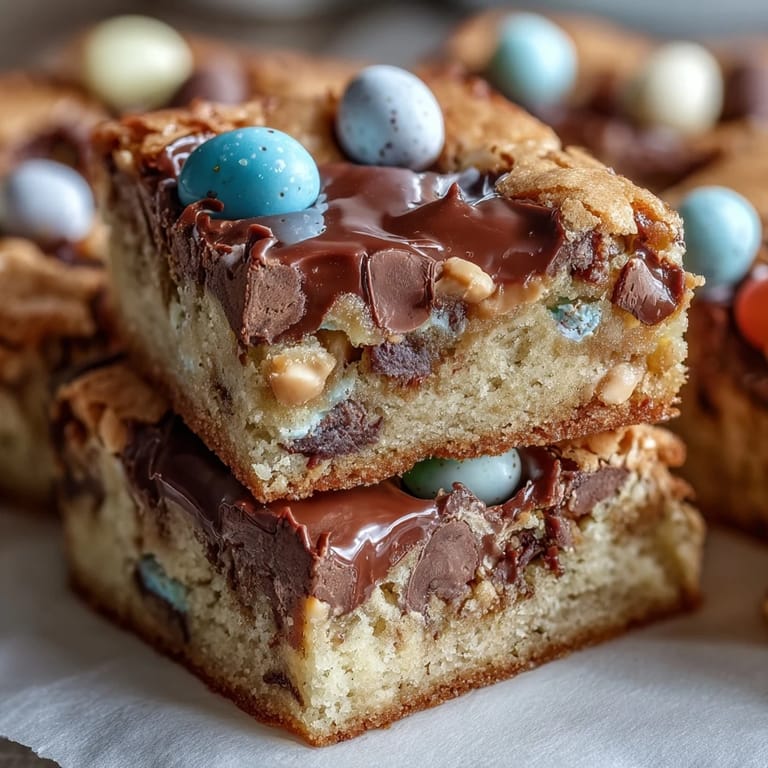
 Last spring, my kitchen was filled with a parade of laughter and a surprising amount of pastel candy shells rolling across the counter. I hadn't set out to bake anything particularly festive, but as I glanced at the small family stash of Easter eggs, inspiration struck. There’s something about the unexpected crackle of color and the creamy peanut butter scent that instantly announces the arrival of spring. Somewhere between mixing and sampling, I learned just how quickly these bars can bring everyone into the kitchen, even before they've cooled. Their cheerful appearance almost feels like a celebration tucked into every bite.
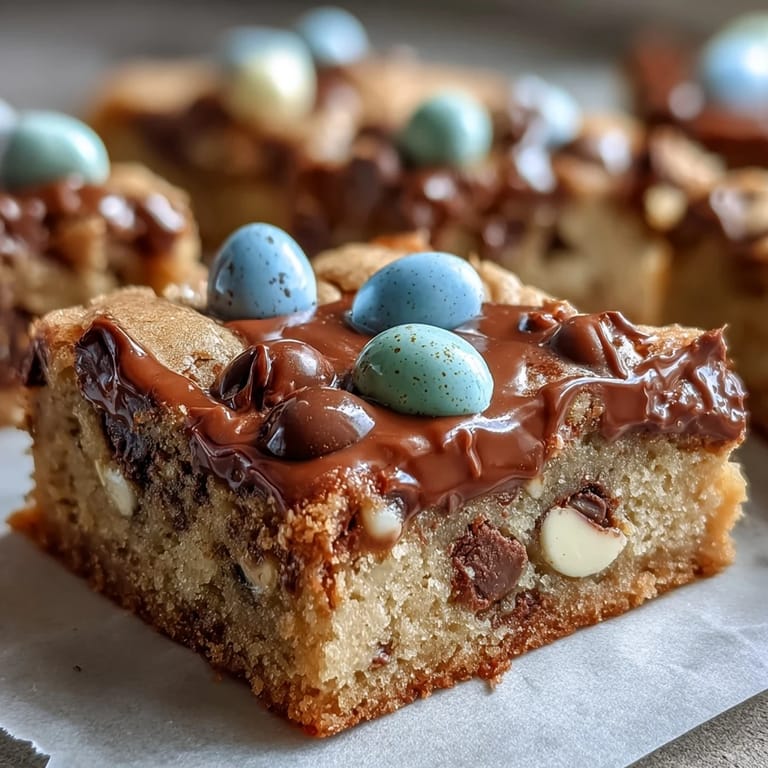
One rainy afternoon, I baked these Peanut Butter Easter Egg Cookie Bars for a group of friends sheltering from a surprise April shower. The kitchen smelled warm with brown sugar and roasted peanuts, and the jingling clatter of the chocolate eggs hitting the mixing bowl became part of the soundtrack. No one wanted to wait for them to fully cool, so we risked wonky slices to dive right in, laughter echoing over uneven portions. Someone swiped a chocolate egg off a corner while they were still on the tray. It was the kind of casual gathering where every crumb felt earned and memorable.
Ingredients
- Unsalted butter:&strong> Melting it first makes for an extra chewy bar, and letting it cool slightly helps avoid scrambling the eggs.
- Creamy peanut butter:&strong> Peanut butter is the star—using creamy keeps the texture smooth and even.
- Light brown sugar:&strong> This brings moisture and a rich, caramel undertone that pairs beautifully with peanut butter.
- Granulated sugar:&strong> Just a touch rounds out the sweetness and helps the cookie bars bake up with the perfect crust.
- Eggs:&strong> They hold everything together, so I always make sure they’re at room temperature for better blending.
- Vanilla extract:&strong> Adds a mellow warmth that softens the sweetness and brings out the peanut butter flavor.
- All-purpose flour:&strong> The backbone of these bars; measure carefully for the best density.
- Baking powder and baking soda:&strong> A balance between these keeps the bars thick but not too cakey.
- Salt:&strong> Never skip this—it brings all the flavors into sharp focus and keeps things from tasting flat.
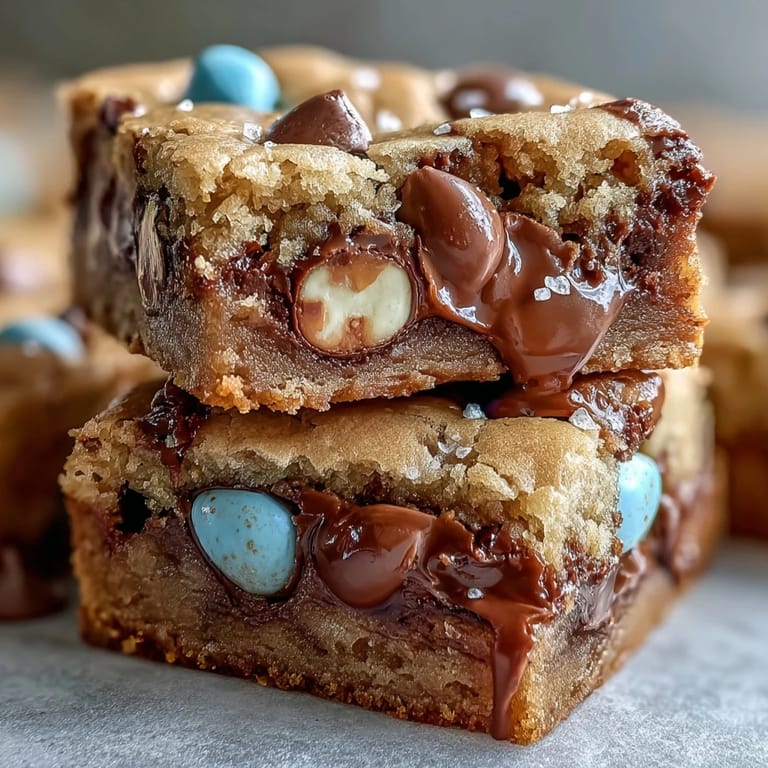
- Easter egg chocolate candies:&strong> Waves of chocolate and crunch, with extra for decorating on top; press them in just before baking.
- Semi-sweet chocolate chips (optional):&strong> I sometimes toss these in for extra pockets of melty chocolate, especially if serving chocolate lovers.
Tired of Takeout? 🥡
Get 10 meals you can make faster than delivery arrives. Seriously.
One email. No spam. Unsubscribe anytime.
Instructions
- Get Ready:
- Set your oven to 350°F (175°C) and line a 9x9-inch pan with parchment, leaving enough overhang to lift the bars out easily later.
- Mix the Wet Ingredients:
- In a large bowl, whisk together the melted butter, creamy peanut butter, both sugars, and take your time until everything transforms into a smooth, shiny mixture.
- Add in Eggs and Vanilla:
- Drop in the eggs, one at a time, and vanilla, whisking gently—watch for a creamy, cohesive texture to know it’s ready for the dry mix.
- Combine the Dry Ingredients:
- In another bowl, lightly whisk together flour, baking powder, baking soda, and salt, being careful not to overwork—this step matters for tenderness.
- Bring It Together:
- Gently fold the dry ingredients into the wet with a spatula, working just until there are no dry streaks left; stop before it becomes stiff.
- Fold in the Treats:
- Add the Easter egg candies (and chocolate chips if you like), folding patiently so the candies spread evenly and don’t crush too much.
- Fill the Pan:
- Scoop and spread the dough evenly into your prepared pan, then nestle a few extra candies on top for pretty speckles.
- Bake:
- Bake for 22-25 minutes, watching for golden edges and a center that looks just set, not dry—the smell will let you know they’re nearly there.
- Cool and Serve:
- Let the bars cool completely in the pan before lifting them out with the parchment overhang. Slice into squares and sneak the first edge piece to yourself.
 Save Pin
 The first time my niece bit into one and immediately asked, "Can we have these for every holiday?" I realized these weren’t just bars—they were a new tradition in the making. Suddenly, even leftover Easter candy had a delicious new destiny.
Swapping Ingredients for Any Occasion
The temptation to make these year-round is real. After Easter, I’ll swap in mini chocolate chips, toffee bits, or rainbow sprinkles—essentially any fun mix-ins to suit the season or whatever’s on hand. Changing up the candies keeps things exciting without altering the reliable, peanut buttery base. It’s a flexible recipe you’ll want to play around with and personalize for birthdays or spontaneous sweet cravings.
How to Store and Share
I've found these bars hold up perfectly in an airtight container for several days, so they're easy to make ahead for events. If you want to prep a batch in advance, they freeze well tightly wrapped; I pop a few in school lunches straight from the freezer, where they stay fresh and delightfully chewy. For gifting, wrap squares in parchment with a ribbon—people love the pop of color showing through. The bars travel well without crumbling, making them my go-to for bake sales and potlucks.
Troubleshooting The Chewiest Bars
If you ever end up with dry bars, double-check the baking time and be cautious not to overmix after adding the flour—that was a real game changer for me. Sometimes the urge to slice them warm is overwhelming, but trust me, a full cool-down gives the best texture and clean slices. Room temperature eggs and melted (not hot) butter are small details that make a big difference.
- If candies crack in the oven, try a slightly lower rack next time.
- Be generous pressing extra Easter eggs onto the surface—those bits always get picked off first.
- Save a corner piece for yourself; it’s secretly the best spot.
 Save Pin
 If you find yourself with extra candies or a craving for something simple and homemade, these bars are always the answer. Here’s to cheerful baking and finding tiny reasons to celebrate.
Recipe FAQs
- → Can I use different candies if I don’t have Easter eggs?
Yes, you can use any chocolate candy-coated pieces such as M&Ms or chopped chocolate for a similar look and taste.
- → Should I melt the butter before mixing?
Yes, use melted and slightly cooled butter to ensure a soft, chewy bar texture and smooth batter consistency.
- → How do I know when the bars are done baking?
The edges should be lightly golden and the center just set. Avoid overbaking to keep bars moist and soft.
- → Can I make these bars in advance?
Absolutely. Store them in an airtight container at room temperature for up to four days and enjoy fresh bars anytime.
- → How can I make these bars extra peanut buttery?
Try drizzling melted peanut butter over the cooled bars or use crunchy peanut butter for more texture.