 Save Pin
 The smell hit me first: butter browning at the edges, sweet jam bubbling in tiny wells. I was pulling my third tray from the oven when I realized I'd forgotten to set a timer for the first two batches. They were darker than I wanted, but still good, still buttery, still worth eating warm with tea. That's when I learned shortbread forgives you if you pay attention to the color, not the clock.
I started making these for a friend who always brought store bought biscuits to our weekly coffee meetups. One week I swapped her tin for mine, filled with these raspberry swirls still warm from the oven. She didn't say anything at first, just took a bite, then another, then asked if I'd made them. When I nodded, she smiled and said they tasted like the kind of thing her grandmother would have baked. I've been making them ever since.
Ingredients
- Unsalted butter, softened: This is the soul of shortbread, so use good quality butter and let it sit at room temperature until it's soft enough to press a finger into but not greasy or melted.
- Powdered sugar: It dissolves faster than granulated and gives the cookies a finer, more delicate crumb that melts on your tongue.
- Vanilla extract: A teaspoon is enough to add warmth without overpowering the buttery richness, but make sure it's real vanilla, not imitation.
- All purpose flour: Measure it by spooning into the cup and leveling off, not scooping directly from the bag, or you'll end up with dry, crumbly dough.
- Salt: Just a pinch balances the sweetness and brings out the flavor of the butter in a way you'll notice if you skip it.
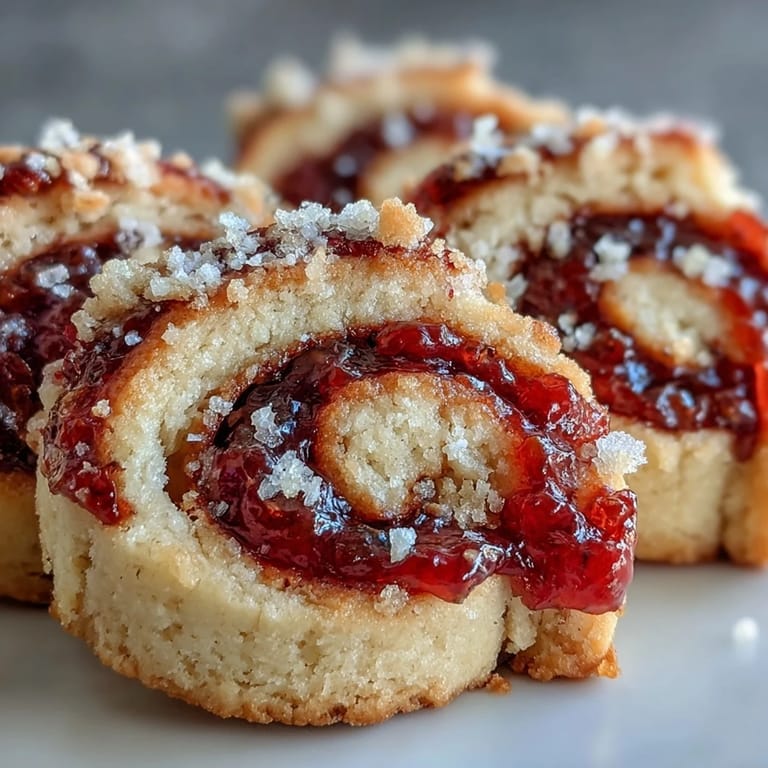
- Raspberry jam or preserves: Use a seedless variety if you prefer, but I like the tiny seeds because they remind you it's real fruit, not just sugar.
- Granulated sugar for dusting: Optional, but it adds a subtle sparkle and a hint of extra sweetness that makes these feel a little more special.
Tired of Takeout? 🥡
Get 10 meals you can make faster than delivery arrives. Seriously.
One email. No spam. Unsubscribe anytime.
Instructions
- Prep your oven and pans:
- Preheat to 350°F and line two baking sheets with parchment paper so the cookies release easily and bake evenly. If you skip the parchment, the bottoms might stick or brown too fast.
- Cream the butter and sugar:
- Beat the softened butter and powdered sugar with an electric mixer until the mixture looks pale, fluffy, and almost doubles in volume, about 2 to 3 minutes. This step traps air and makes the cookies tender.
- Add the vanilla:
- Mix in the vanilla extract until it's fully blended and the dough smells warm and sweet. Don't rush this, it only takes a few seconds.
- Combine the dry ingredients:
- Whisk the flour and salt together in a separate bowl, then add it to the butter mixture in two or three additions, mixing just until the dough comes together. Overworking it will make the cookies tough instead of tender.
- Shape and chill the dough:
- Turn the dough onto a lightly floured surface and shape it into a log about 1.5 inches thick, then wrap it tightly in plastic wrap and refrigerate for at least 30 minutes. Chilling firms up the butter so the cookies hold their shape in the oven.
- Slice the cookies:
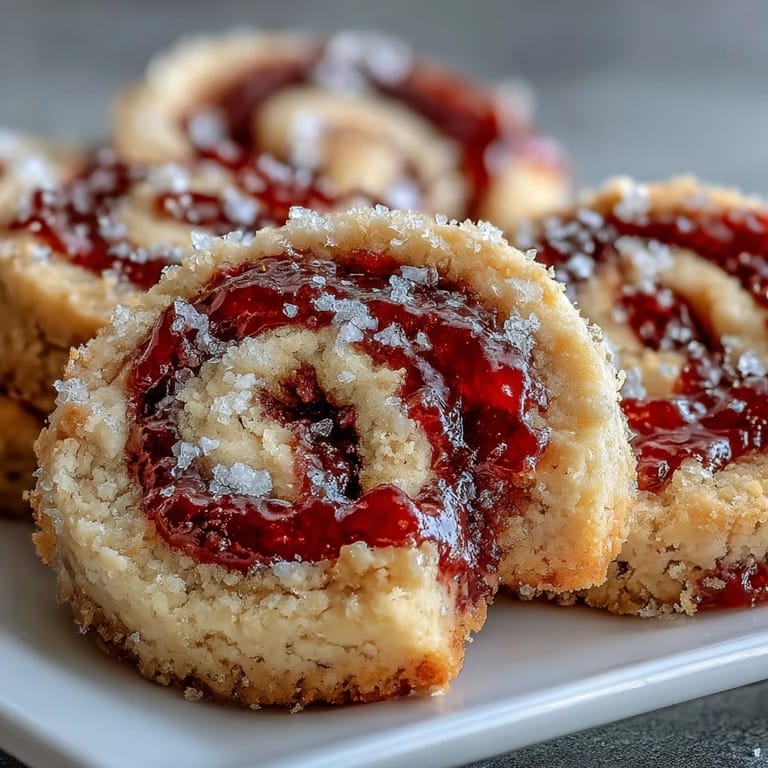
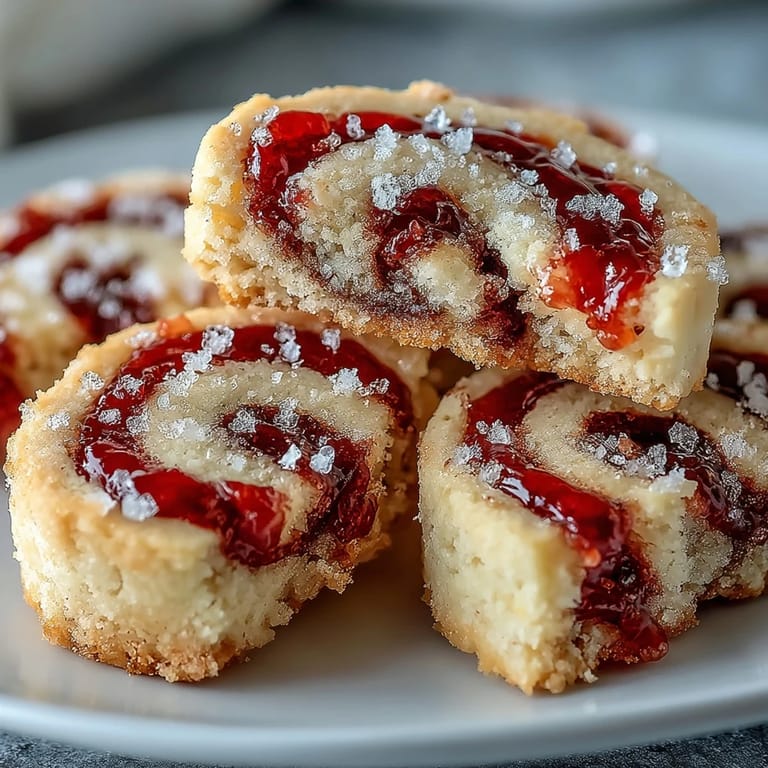
- Unwrap the chilled log and use a sharp knife to cut it into rounds about 1/4 inch thick, wiping the blade between cuts if it gets sticky. Place them on the prepared baking sheets about an inch apart.
- Make the indentations:
- Press the back of a teaspoon gently into the center of each cookie to create a small well for the jam. Don't press all the way through, just enough to make a shallow dip.
- Fill with jam:
- Spoon about half a teaspoon of raspberry jam into each indentation, being careful not to overfill or it will bubble over and burn on the pan. A little goes a long way.
- Bake until golden:
- Slide the sheets into the oven and bake for 12 to 15 minutes, watching the edges for a light golden color. The centers will still look pale, and that's exactly right.
- Cool on the pan:
- Let the cookies sit on the baking sheets for 5 minutes to firm up before moving them. If you try to lift them too soon, they might crack or fall apart.
- Finish cooling and dust:
- Transfer the cookies to a wire rack and let them cool completely, then dust with granulated sugar if you like. They'll crisp up as they cool and the jam will set into a glossy, tangy swirl.
 Save Pin
 One winter afternoon, I packed a tin of these cookies and walked them over to my neighbor who'd just had surgery. She opened the door in her bathrobe, tired but smiling, and when she lifted the lid, she said the smell alone made her feel better. We sat at her kitchen table with tea, and she ate three cookies before I left. That night, she texted me a photo of the empty tin with a single word: magic.
Choosing Your Jam
Raspberry is classic, but I've used apricot, strawberry, and even a spicy ginger preserve when I wanted something unexpected. The key is to pick a jam that's thick enough to stay put in the well, not runny or it will spread during baking. I once tried a homemade fig jam and the cookies tasted like something from a fancy bakery, even though they took the same amount of effort.
Storage and Gifting
These cookies keep beautifully in an airtight container at room temperature for up to a week, layered between sheets of parchment if you're stacking them. I've packed them in tins for teachers, neighbors, and coworkers, and they always look impressive even though they're simple to make. If you're gifting them, tie the tin with a ribbon and tuck in a handwritten note, it makes them feel even more special.
Variations and Add Ins
If you want to change things up, try adding a pinch of lemon zest to the dough for a bright, citrusy note that pairs beautifully with the raspberry. I've also rolled the edges of the log in coarse sugar before slicing, which gives the cookies a sparkly, crunchy rim. Some people like to drizzle melted white chocolate over the cooled cookies, but I think they're perfect as they are.
- Swap raspberry for apricot, blackberry, or even lemon curd for a different flavor every time.
- Add a quarter teaspoon of almond extract to the dough if you love that subtle marzipan hint.
- Press a whole fresh raspberry into the center instead of jam for a rustic, bakery style look.
 Save Pin
 There's something about pulling a tray of these from the oven, jammy and golden, that makes the whole kitchen feel warmer. I hope they become part of your favorite moments, too.
Recipe FAQs
- → Can I use different fruit preserves?
Absolutely. While raspberry jam provides classic tartness and vibrant color, you can substitute strawberry, apricot, blackberry, or any favorite fruit preserves. Thicker jams work best to prevent spreading during baking.
- → How should I store these cookies?
Store in an airtight container at room temperature for up to one week. Layer parchment paper between stacked cookies to prevent sticking. The jam filling may soften the shortbread slightly over time, but they remain delicious.
- → Why must I chill the dough before baking?
Chilling firms the butter-rich dough, making it easier to slice into clean rounds without losing shape. The 30-minute rest also allows flour to hydrate fully, resulting in more tender shortbread that holds its pattern and indentation during baking.
- → Can I freeze the dough or baked cookies?
Yes, both freeze well. Wrap the sliced dough log tightly and freeze for up to 3 months—slice and bake directly from frozen, adding 1-2 minutes to baking time. Baked cookies freeze in airtight containers for up to 3 months; thaw at room temperature.
- → What's the best way to create perfect jam indentations?
Use the back of a rounded teaspoon to press gently into the center of each sliced round, applying even pressure to create a well about 1/4 inch deep. Fill carefully without overflowing, as jam expands slightly while baking.
- → Can I make these without an electric mixer?
Certainly. Cream the butter and sugar by hand using a wooden spoon, though it will take longer—about 5-7 minutes of vigorous stirring to achieve the desired light, fluffy consistency. Proceed with the remaining steps as written.