 Save Pin
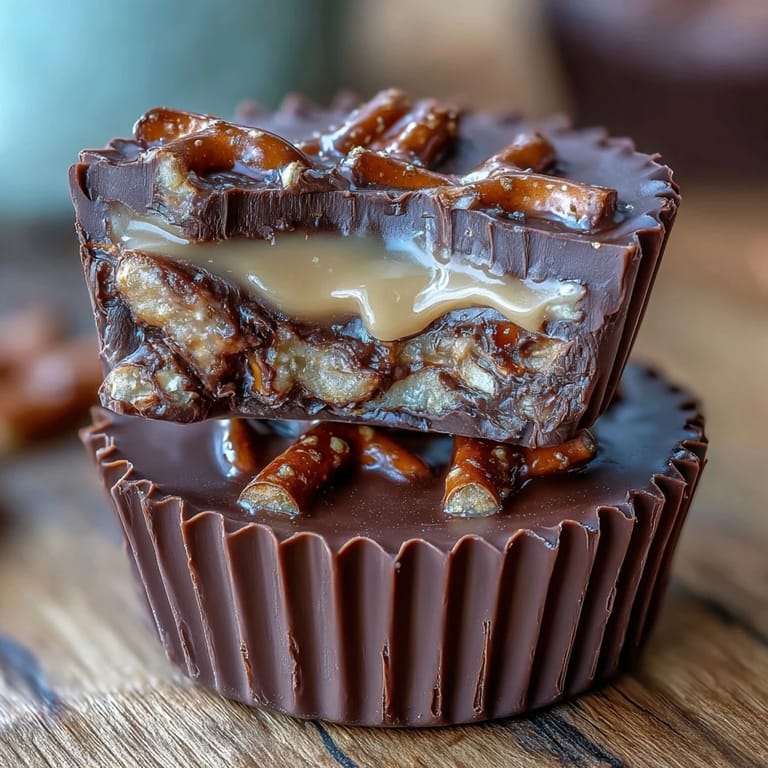
 My neighbor handed me one of these at a block party last summer, and I bit into it expecting a regular candy bar experience. Instead, the pretzel base crackled between my teeth while the peanut butter melted on my tongue, followed by that smooth chocolate finish—and I was sold. I'd never thought about layering textures like that before, but suddenly it made complete sense why this combination keeps showing up in every candy shop. What really got me was how simple it seemed to make once I realized the magic was just about assembly and patience with the refrigerator.
I made a batch for my daughter's teacher appreciation week, and honestly, watching her face light up when she realized I'd made them from scratch was the real payoff. She brought the empty container back the next day with a note saying her whole staff had demolished them in one sitting, which felt like winning an award. That's when I realized these weren't just a treat—they were the kind of thing that made someone feel genuinely special.
Ingredients
- Mini salted pretzels, crushed (1 cup, about 60 g): The backbone of this whole thing—don't skip the salt because it's what makes your brain keep reaching for another cup. Crush them by hand in a bag so you get a mix of fine pieces and chunky bits.
- Unsalted butter, melted (2 tbsp): This binds everything together and helps the base stay intact when you bite into it.
- Creamy peanut butter (3/4 cup, 180 g): Use a brand you actually like eating straight from the jar, because that's basically what you're making here. Natural or conventional both work, but stir well if you're using natural to get the oil incorporated.
- Powdered sugar (1/4 cup, 30 g): Sweetens the peanut butter layer without making it grainy like regular sugar would.
- Vanilla extract (1/4 tsp): A tiny whisper that rounds out the peanut butter flavor without making it taste vanilla-forward.
- Salt (pinch): Amplifies every other flavor and balances the sweetness.
- Semi-sweet chocolate chips (1 1/4 cups, 210 g): The final layer that holds everything together visually and protects your peanut butter from air exposure.
- Coconut oil or unsalted butter (1 tbsp): Thins out the chocolate so it spreads smoothly without adding extra cocoa flavor.
Tired of Takeout? 🥡
Get 10 meals you can make faster than delivery arrives. Seriously.
One email. No spam. Unsubscribe anytime.
Instructions
- Set Up Your Workspace:
- Line your muffin tin with paper liners and have everything within arm's reach—you'll want to move fairly quickly once you start layering. This is one of those recipes where prep work makes the actual cooking part feel effortless.
- Create the Pretzel Base:
- Mix your crushed pretzels with melted butter in a bowl, coating everything evenly, then spoon about a tablespoon into each liner and press down firmly with your thumb or the back of the spoon. You want it compacted enough to hold together but not so hard that it becomes more wall than floor.
- Build the Peanut Butter Layer:
- Combine peanut butter, powdered sugar, vanilla, and a pinch of salt until smooth, then dollop about a tablespoon onto each pretzel base and gently spread it out with the back of a spoon. Don't overwork it—you're aiming for even coverage, not perfection.
- Melt the Chocolate:
- Heat your chocolate chips and coconut oil together in 30-second intervals in the microwave, stirring between each burst until silky and completely melted. This slow approach prevents the chocolate from seizing up and becoming grainy.
- Top and Seal:
- Spoon the melted chocolate over each peanut butter layer and smooth the tops with the back of the spoon, making sure the chocolate extends to the edges so it acts as a seal. This final layer protects everything underneath from drying out.
- Chill and Set:
- Refrigerate for at least 30 minutes until the chocolate is firm to the touch and the whole thing feels solid when you gently press it. Your patience here is what transforms loose layers into a proper candy.
- Finish and Store:
- Pop them out of the liners once they're set and transfer to an airtight container where they'll stay fresh in the refrigerator for weeks, though they rarely last that long.
 Save Pin
 There's something oddly therapeutic about pressing pretzel bits into butter and knowing you're creating something people will actually be excited to eat. My kitchen smelled incredible—salty, chocolatey, and toasted all at once—and for once I didn't mind the waiting because I knew the payoff was coming.
Why the Layers Matter
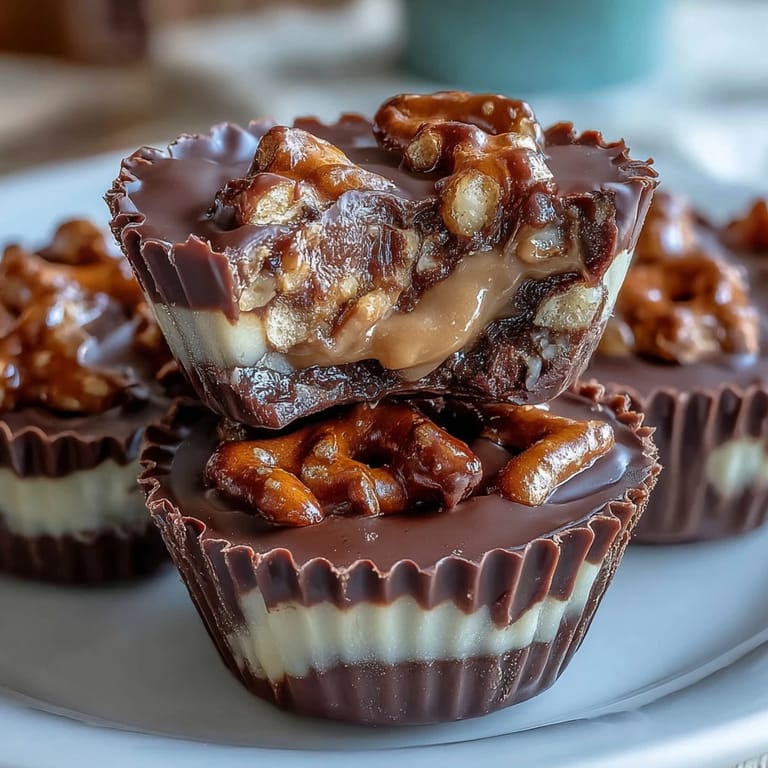
I used to make regular fudgy peanut butter candies, but they always felt a bit one-note and heavy after a few bites. The pretzel adds this textural break that keeps your mouth interested, and the chocolate on top isn't just decoration—it's protection and finality, the thing that makes you feel like you're eating a real candy instead of just scooping peanut butter. The three-layer structure also means every single bite gets all three elements, so you never get a boring pocket of just one flavor.
Chocolate Choices and Temperature
Semi-sweet works as a sweet-salty balance, but I've experimented with dark chocolate when I want something closer to those fancy craft candy bars, and milk chocolate when I'm making them for people who prefer things sweeter. The type of chocolate you choose changes the whole personality of these cups, so don't feel locked into what the recipe says—what matters is that you like how it tastes. Temperature-wise, just make sure your chocolate isn't so cold coming out of the microwave that it's thick and clumpy, and not so warm that it slides off the peanut butter before setting.
Flavor Variations and Final Touches
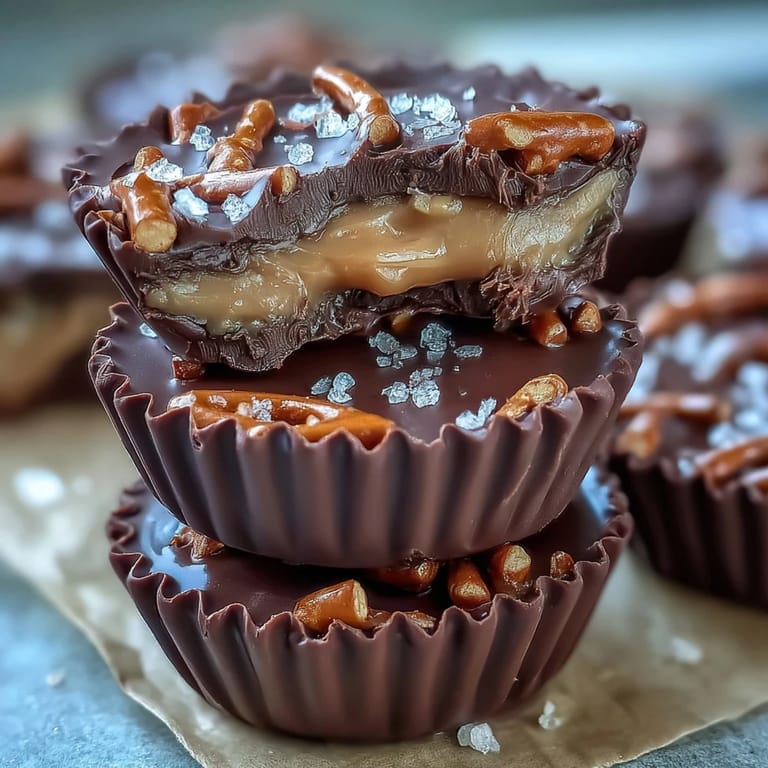
Once you've made the basic version, you'll start seeing all the ways you can play with it. I've added a tiny sprinkle of sea salt on top of the chocolate before it sets, made a batch with almond butter for someone with a peanut allergy, and once even added a faint hint of espresso powder to the peanut butter layer for an afternoon pick-me-up. The pretzel stays crunchy for weeks in the fridge, and the peanut butter filling stays creamy if you're storing them properly, so these are genuinely make-ahead friendly. The whole process from start to finish is less than an hour, and most of that is just waiting for the refrigerator to do its job.
- Sprinkle extra crushed pretzels on top of the chocolate before chilling for maximum crunch and visual appeal.
- Let these come to room temperature for about 5 minutes before eating if you like the chocolate a bit softer and more melt-in-your-mouth.
- Store in the coldest part of your refrigerator and they'll stay fresh for up to three weeks if nobody eats them first.
 Save Pin
 These cups are proof that sometimes the best desserts are just different versions of things you already love, arranged in a way that makes them feel brand new. Once you make them once, you'll be making them for every occasion forever.
Recipe FAQs
- → How do I make the pretzel base for these cups?
Crush mini salted pretzels and mix with melted butter, then press the mixture firmly into muffin liners to create an even crunchy base.
- → Can I use a different chocolate for the topping?
Yes, dark chocolate offers a richer taste, while milk chocolate provides a sweeter flavor. Both work well as the smooth topping layer.
- → Is it possible to make these gluten-free?
Absolutely, by substituting regular pretzels with gluten-free varieties, you can enjoy these cups without gluten concerns.
- → What is the best way to melt chocolate for the topping?
Use a microwave-safe bowl to melt chocolate chips with coconut oil in 30-second intervals, stirring until smooth and creamy.
- → How long should I chill the cups before serving?
Chilling in the refrigerator for at least 30 minutes helps the layers firm up and enhances the texture of each cup.