 Save Pin
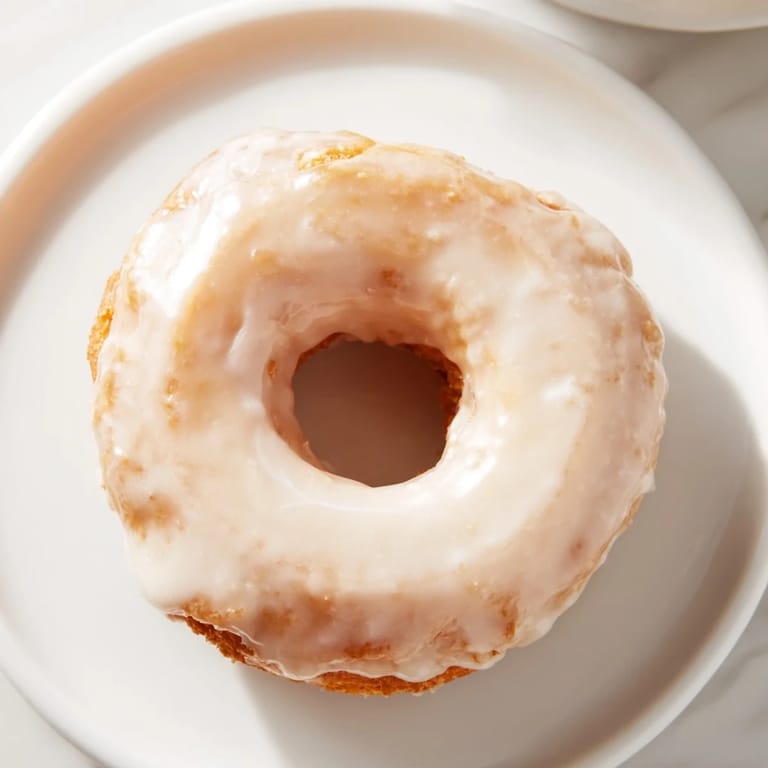
 There's something about the smell of yeast donuts frying that pulls me right back to Saturday mornings at my grandmother's kitchen, where she'd hum while oil shimmered in her old cast-iron pot. I didn't appreciate it then—I was too focused on sneaking a warm donut before the glaze had even set—but years later, I realized I was watching a master work. These glazed yeast donuts are lighter and airier than anything you can grab from a box, with that perfect tender crumb that melts on your tongue. When I finally learned to make them myself, I understood why she'd wake up so early just to have these ready.
I remember making these for my partner's birthday brunch, and the moment they bit into one still warm from the cooling rack, their entire face changed. That's when I knew the effort was worth it. The kitchen had been warm and slightly chaotic—flour everywhere, the mixer whirring, the smell building—but that one moment of quiet joy made every step feel sacred.
Ingredients
- All-purpose flour: This is your foundation, and measuring by weight makes a real difference in getting the texture right; if you only have a measuring cup, spoon and level rather than scooping directly.
- Whole milk, warmed: Warmth activates the yeast properly, but if it's too hot it'll kill the yeast, so aim for around 110°F—warm to the touch but not so hot you can't hold your finger in it.
- Active dry yeast: One packet is all you need, and freshness matters; if it's been sitting in your cabinet for a year, grab a new one.
- Unsalted butter, melted: This keeps the dough tender and rich without adding unwanted salt that would interfere with the yeast.
- Granulated sugar: Just a quarter cup feeds the yeast and adds subtle sweetness to the dough itself.
- Eggs at room temperature: Cold eggs can shock the dough and slow fermentation, so pull them out about an hour before you start.
- Fine salt: A pinch goes into both the dough and glaze; it brightens flavors without making anything taste salty.
- Neutral oil for frying: Canola or vegetable oil stays neutral and lets the donut shine; don't use olive oil or coconut oil here.
- Powdered sugar, sifted: Sifting removes lumps and makes the glaze impossibly smooth and glossy.
- Pure vanilla extract: The real thing tastes like velvet compared to imitation; it's worth the investment.
Tired of Takeout? 🥡
Get 10 meals you can make faster than delivery arrives. Seriously.
One email. No spam. Unsubscribe anytime.
Instructions
- Wake up the yeast:
- Combine warm milk and yeast in a small bowl and let it sit for 5 minutes until it looks foamy and alive. You'll actually see it come to life, which is a small miracle every single time.
- Build your dough base:
- In your mixing bowl, whisk together the flour, sugar, and salt so everything is evenly distributed. This prevents pockets of saltiness or dense flour later.
- Bring it together:
- Pour in the yeast mixture, melted butter, and eggs, then mix until you have a sticky, shaggy dough. It'll look almost like it won't come together, but keep going.
- Knead until silky:
- Knead for 5 to 7 minutes on medium speed in a stand mixer or by hand until the dough becomes smooth and elastic. You'll feel it transform under your hands from rough to supple.
- First rise:
- Place the dough in a greased bowl, cover it with a kitchen towel, and let it rise in a warm spot for 1 to 1.5 hours until it's doubled. A warm corner of your kitchen, near a window, or even in a turned-off oven works beautifully.
- Shape your donuts:
- Turn the dough onto a floured surface and roll it out to a half-inch thickness. Use a floured 3-inch donut cutter to cut out rings, then save the holes for donut holes. Reroll the scraps gently and cut again until you've gotten as much as you can.
- Second rise:
- Lay the cut donuts and holes on parchment paper, cover loosely, and let them puff up for 30 to 45 minutes. They should look puffy and slightly jiggly when you poke them gently.
- Heat your oil:
- In a deep fryer or large, heavy-bottomed pot, heat your oil to exactly 350°F. Use a thermometer; it's not guesswork territory.
- Fry with confidence:
- Working in batches so you don't crowd the oil, carefully slide the donuts in and fry for about 1 to 1.5 minutes per side until golden brown. They'll float to the top when they're ready to flip.
- Cool gracefully:
- Transfer fried donuts to a wire rack lined with paper towels using a slotted spoon. Let them cool for just a few minutes before glazing so the glaze adheres but the donut is still warm.
- Make the glaze:
- Whisk powdered sugar, milk, vanilla, and salt until completely smooth. It should be pourable but thick enough to coat.
- Glaze with care:
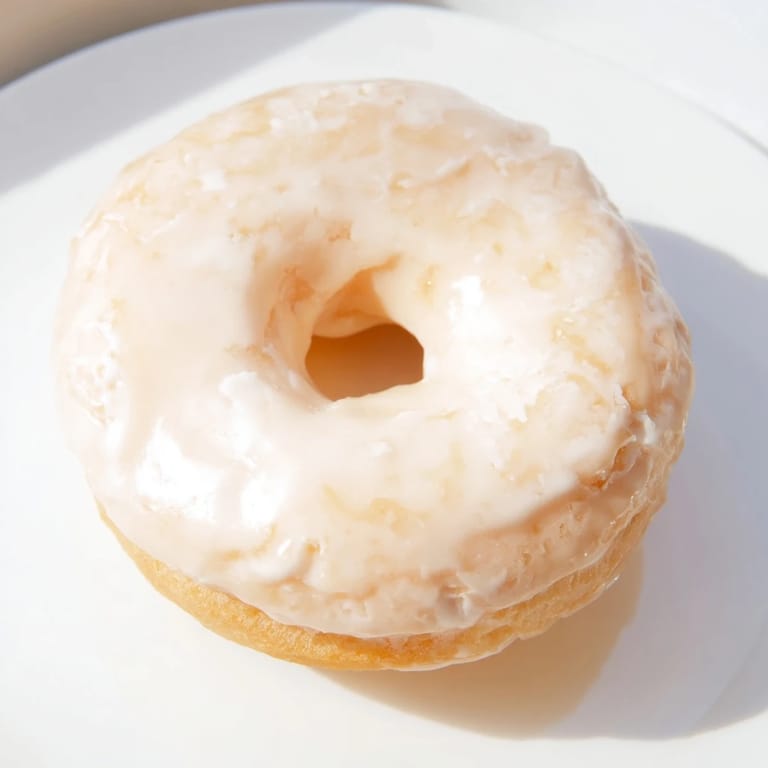
- Dip each warm donut into the glaze, turning gently, then let excess drip off before placing it back on the rack. The glaze will set within minutes, creating that gorgeous glossy finish.
 Save Pin
 Years later, I still make these when someone I love needs comforting or celebrating, and there's always a moment during the frying when I think of my grandmother standing at her stove. She's taught me that the best recipes aren't about impressing anyone—they're about showing up and making something with intention.
Flavor Variations Worth Trying
The vanilla glaze is classic for a reason, but once you've mastered the base, you can play around. A tiny bit of grated nutmeg or cardamom whisked into the dough adds a subtle warmth that people can't quite name but absolutely love. For the glaze, try swapping the vanilla for almond extract, or add a teaspoon of fresh lemon zest for brightness. Some mornings I brush the warm donuts with cinnamon sugar instead of glazing them, and they're perfect that way too.
Timing and Make-Ahead Strategy
The total time includes rising, but most of that is hands-off. You're really only active in the kitchen for about 15 minutes of mixing and rolling, then another 10 minutes for frying and glazing. If you want to get ahead, you can prepare the dough the night before, refrigerate it, and let it come to room temperature in the morning before the first rise. Fresh donuts are best eaten the day you make them, but they'll keep in an airtight container for a day or two if you have any willpower.
Equipment That Matters
A stand mixer isn't absolutely necessary, but it makes kneading infinitely easier and more reliable. For the donut cutter, you really do need the ring shape, not just a round cutter; if you don't have one, you can improvise with two round cutters of different sizes. An instant-read thermometer for the oil is non-negotiable—it takes the guesswork out entirely and ensures perfect donuts every time.
- A slotted spoon keeps oil off your finished donuts and makes flipping safe and easy.
- Parchment paper under the shaped donuts prevents sticking and makes transfer to the fryer seamless.
- A wire rack elevated from the towels lets air circulate so the bottoms don't get soggy as they cool.
 Save Pin
 These donuts are proof that homemade doesn't have to be complicated or intimidating. Every time you make them, you'll get a little faster and more confident, until one day you're the one humming in the kitchen.
Recipe FAQs
- → How do I get the donuts extra light and airy?
Allowing the dough to rise twice, first until doubled and then puffed, ensures a fluffy texture. Kneading until smooth and elastic also helps develop the right crumb.
- → What oil is best for frying these donuts?
Neutral oils like canola or vegetable oil with a high smoke point work best to achieve golden, evenly cooked donuts.
- → Can I add flavors to the glaze?
Yes, almond extract or citrus zest can replace vanilla in the glaze for a different but complementary flavor twist.
- → How do I store leftover donuts?
Store in an airtight container at room temperature for 1–2 days to maintain freshness and softness.
- → Is it necessary to use a stand mixer?
A stand mixer helps with kneading the sticky dough, but you can knead by hand using a wooden spoon and some elbow grease.