 Save Pin
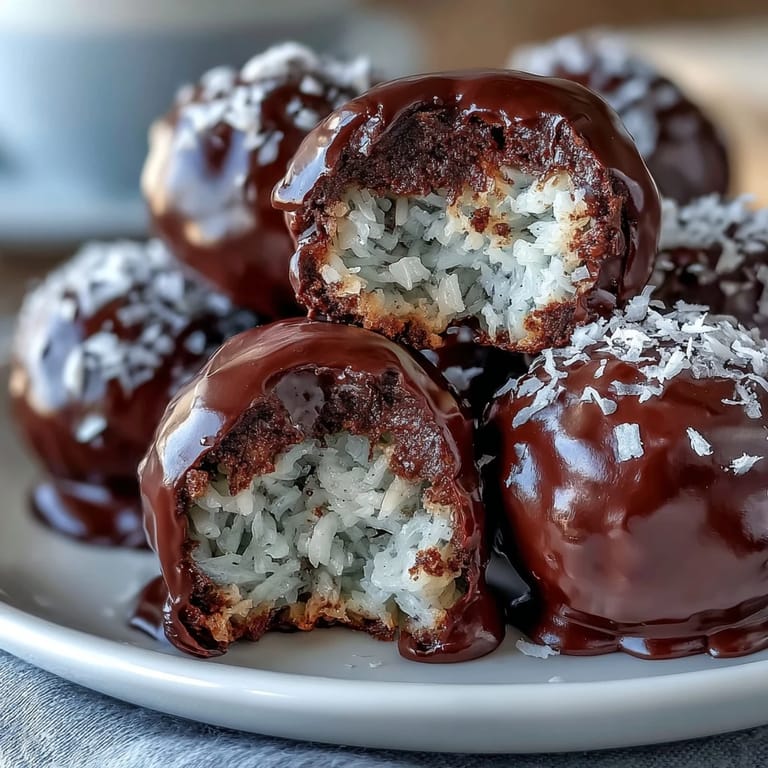
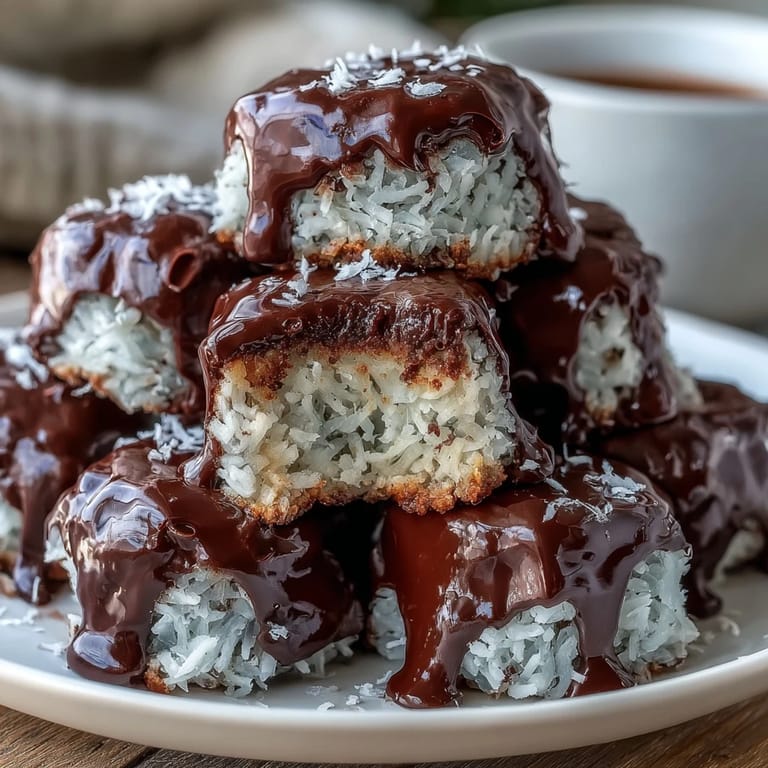
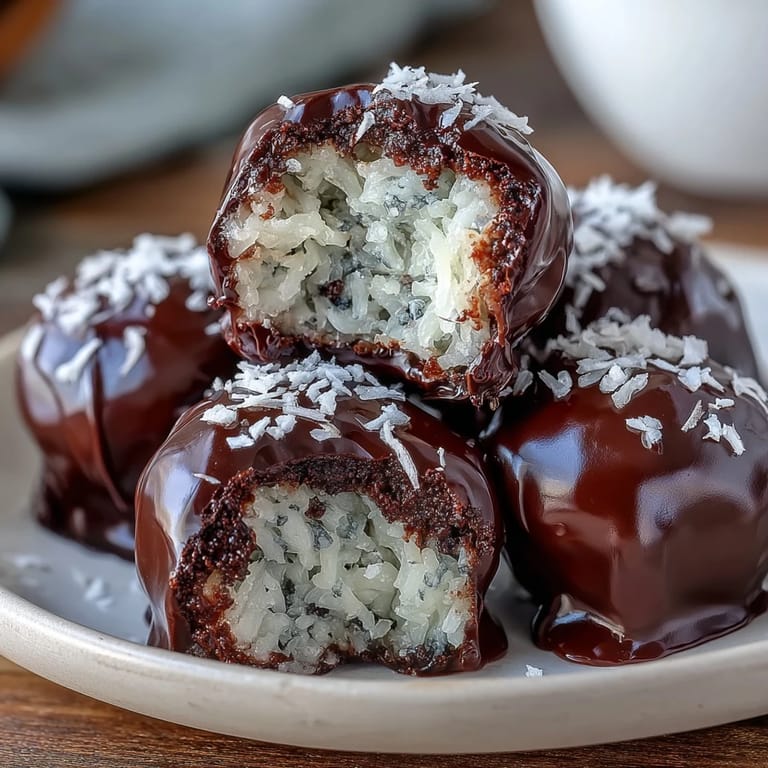
 My coworker Sarah brought these to the office one Tuesday, and I watched three people reach for seconds before the bowl was even half empty. She casually mentioned they took fifteen minutes to make, which seemed impossible given how polished they looked. The chocolate coating caught the light like little jewels, and when I bit into one, that perfect snap of dark chocolate gave way to creamy coconut that tasted indulgent without any of the guilt. I immediately asked for the recipe, and what struck me most was how simple the ingredient list actually was.
I brought a batch to my sister's book club, nervous they'd be too healthy and therefore disappointing. Instead, one woman asked if I was selling them, and another disappeared into the kitchen with three on her plate before we even started discussing the novel. My sister caught my eye across the room with this satisfied smile, the kind that says she knew I'd nailed it. That's when I realized these weren't just a snack, they were a conversation starter, a moment where everyone paused and just enjoyed something simple and good together.
Ingredients
- Unsweetened shredded coconut (2 cups): This is your base, and it's crucial you buy the unsweetened kind or your bites will taste like dessert pretending to be health food instead of the other way around.
- Coconut oil (3 tbsp, melted): This acts as the binder that helps everything stick together when you squeeze it, and melting it first ensures a smooth mixture without lumps.
- Maple syrup (3 tbsp): The natural sweetness here is subtle enough that the coconut flavor gets to shine, and it adds just enough moisture to make the mixture workable.
- Vanilla extract (1 tsp): A small amount goes a long way, rounding out the flavor so it doesn't taste one-dimensional or overly coconutty.
- Dark chocolate chips (1 cup, dairy-free optional): This is your finishing touch, the element that makes these feel fancy, so don't skimp on quality or you'll taste the difference immediately.
Tired of Takeout? 🥡
Get 10 meals you can make faster than delivery arrives. Seriously.
One email. No spam. Unsubscribe anytime.
Instructions
- Prep your workspace:
- Line your baking sheet with parchment paper so nothing sticks, and have all your ingredients measured out before you start—this fifteen minute timeline depends on you being organized.
- Blend the coconut mixture:
- Pulse the coconut, melted oil, maple syrup, and vanilla in a food processor until the mixture looks crumbly but holds together when you squeeze it in your palm. You're looking for that sweet spot between dry and wet, usually about thirty to forty pulses depending on your processor.
- Shape your bites:
- Scoop about a tablespoon of mixture and roll it between your hands into a compact ball or bite-sized shape, placing each one on the parchment paper as you go. If the mixture feels too soft to shape, refrigerate it for five minutes and try again.
- Freeze the coconut bites:
- Pop them in the freezer for twenty to twenty-five minutes until they're firm enough to handle without falling apart. You're not freezing them solid, just firm enough that they won't crumble when you dip them.
- Melt the chocolate gently:
- In a microwave-safe bowl, heat the dark chocolate in twenty-second bursts, stirring between each one, until it's completely smooth and glossy. This gentle approach prevents the chocolate from seizing up or burning, which can happen in seconds if you're not careful.
- Coat each bite:
- Working quickly, dip each frozen coconut bite into the melted chocolate or spoon chocolate over the top until covered, then return it to the parchment-lined baking sheet. The contrast between the cold coconut center and warm chocolate is part of what makes these so good.
- Set the chocolate:
- Give them another ten minutes in the refrigerator or freezer until the chocolate hardens completely and you hear that satisfying snap when you bite into one.
- Store them properly:
- Keep them in an airtight container in the refrigerator for up to ten days or freeze them for up to two months, though they'll probably disappear long before that.
 Save Pin
 My daughter started requesting these for her lunchbox, which meant I was making them every Sunday night like clockwork. One afternoon she came home and told me her friend thought she was buying them from a fancy bakery, and something about that moment made me realize I'd created something that felt special and homemade instead of just healthy. That's the magic of these bites, really—they bridge the gap between indulgence and nourishment without feeling like a compromise.
Why The Freezing Step Matters
I skipped freezing on my first attempt because I was impatient, thinking the coconut mixture was firm enough already. What I got was a chocolate-covered puddle that looked nothing like the elegant bites I'd imagined. The freezing creates a solid center that holds its shape while you dip, turning those few minutes of waiting into the difference between a disappointing experiment and something you're actually proud to serve.
Playing With Add-ins
Once I mastered the basic recipe, I started experimenting with what else could go into that coconut mixture, and that's where things got fun. My favorite discovery was adding cacao nibs for extra crunch and a deeper chocolate flavor, while my partner prefers chopped almonds for texture. The beauty is that the base recipe is forgiving enough to let you make it yours without losing what makes it work.
Storage and Sustainability
These bites are the kind of thing you can make in bulk when you have thirty minutes, then reach into your freezer whenever you need a quick win. I usually make a double batch on a Sunday and portion them into small containers, so there's always something ready to grab. The fact that they last two months frozen means you can actually plan ahead instead of constantly playing catch-up in the kitchen.
- Store them in an airtight container with parchment between layers so they don't stick together in the freezer.
- They'll thaw to perfect eating temperature in about five minutes on the counter if you forgot to pull them out earlier.
- The chocolate coating will crack slightly if you bite them straight from the freezer, which is actually the most satisfying texture if you're into that kind of thing.
 Save Pin
 These bites have become my go-to when I want to feel like a thoughtful friend or family member without any real stress involved. They're proof that simple, honest ingredients treated with a little care can create something that feels genuinely special.
Recipe FAQs
- → What ingredients give these bites their natural sweetness?
Maple syrup and vanilla extract provide gentle, natural sweetness that complements the coconut flavor.
- → Can I substitute the dark chocolate with another type?
Yes, you can use sugar-free or dairy-free chocolate chips depending on dietary needs or preferences.
- → How long should the bites be frozen before chocolate coating?
Freeze the coconut mixture bites for 20-25 minutes until firm but not completely solid, which helps the chocolate adhere smoothly.
- → Are there any recommended tools to prepare these bites?
A food processor makes mixing ingredients easier, along with a microwave-safe bowl for melting the chocolate and parchment paper for lining the baking sheet.
- → How can I add extra texture to these bites?
Incorporate chopped nuts or cacao nibs into the coconut mixture to introduce a crunchy element.