 Save Pin
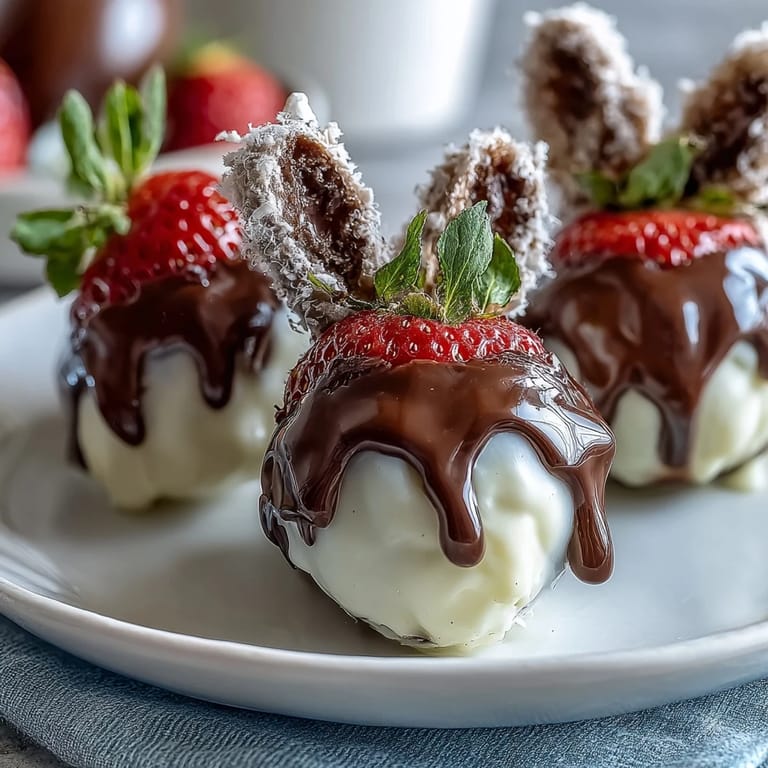
 My daughter's eyes went wide when she spotted the Easter table setup three years ago, but it wasn't until I placed those little strawberry bunnies in front of her that she actually squealed. The kitchen had smelled like melted chocolate, and there was white coating splattered across my apron from enthusiastic dipping, but watching her carefully pick up each one like it was made of spun sugar made every sticky finger mark worth it. That afternoon, she asked if we could make them again next Easter, and every year since, these bunnies have become the one dessert she insists on helping create from start to finish.
I learned the hard way that timing matters when your nephew showed up unexpectedly while I was mid-marshmallow placement and accidentally leaned on one of the bunnies. Instead of throwing it away, I just laughed and remade it while he watched, and somehow that moment of imperfection teaching patience stuck with me more than a perfect batch ever could. Now whenever someone helps me make these, I tell them the marshmallows are forgiving, and if you mess one up, well, that's just practice for the next one.
Ingredients
- Large fresh strawberries (12): Pick berries that are firm with no soft spots, and let them come to room temperature before dipping so the chocolate clings properly instead of sliding right off.
- White chocolate (200 g, chopped): Chop it into small, even pieces so it melts smoothly without clumping, and don't let water near it or the whole batch seizes up and becomes grainy.
- Dark chocolate (60 g, chopped): This is your detail work chocolate, so a quality bar makes the drizzle taste like an actual finishing touch rather than an afterthought.
- Mini marshmallows (24): These are surprisingly delicate once you cut them, so a sharp knife and a gentle touch keep them looking like proper ears instead of mangled bits.
- Edible pink food gel or pink candy melts: The gel gives you precision if you're steady-handed with a toothpick, while melts are more forgiving if you're working alongside excited little helpers.
- Candy eyes or mini chocolate chips (24): Candy eyes stick better to the wet chocolate coating, but chocolate chips have that authentic homemade charm if that's your vibe.
Tired of Takeout? 🥡
Get 10 meals you can make faster than delivery arrives. Seriously.
One email. No spam. Unsubscribe anytime.
Instructions
- Prepare your canvas:
- Line your baking sheet with parchment and wash those strawberries, making absolutely sure they're bone dry or the chocolate will bead up on them like they're repelling water. I learned this after my first batch looked spotted instead of sleek.
- Melt the white chocolate:
- Use a double boiler if you're patient, or microwave in 30-second bursts if you're like me and want results faster. Either way, stir between intervals so you catch it right when it's smooth and glossy, not a seized-up mess.
- Dip with confidence:
- Hold each strawberry by the tip where the stem was, dip it into the white chocolate about three-quarters of the way up, give it a gentle twist, then set it point-side down on the parchment. The coating should look like a little white hat on a red berry.
- Attach the ears while it's still soft:
- Cut your marshmallows in half lengthwise, press two halves gently into the top of each coated strawberry while the chocolate is still tacky, and hold them for just a second so they stick. If the chocolate sets before you get to it, a tiny dab of melted white chocolate acts as glue.
- Add the details:
- Use a toothpick to apply a dot of pink gel or melted pink candy to the center of each marshmallow ear and a small dot on the strawberry's point for a nose. This is where you can get a little creative with how cute you want them to be.
- Place those eyes:
- Press a candy eye or chocolate chip into the strawberry where the face would naturally be, and suddenly it's not just a decorated berry anymore—it's a little character with personality.
- Drizzle the finishing touches:
- Melt the dark chocolate and either pipe it through a small bag for controlled whiskers and a smile, or use a fork to create a wild, artistic drizzle. There's no wrong way here, just your personal style.
- Chill and serve:
- Pop them in the refrigerator for 10 to 15 minutes until the chocolate sets completely. They're best enjoyed fresh and cold, straight from the fridge with everyone gathered around to admire them first.
 Save Pin
 The Easter when my nephew was six, he carefully arranged all twelve bunnies on a serving plate and announced they needed to be presented to the whole family at the table, like a grand finale. We dimmed the lights and he walked them out while everyone clapped, and suddenly this little dessert I'd been making was a full theatrical production. That's when I realized food isn't just about what it tastes like—it's about the moment you're creating when you put it in someone's hands.
The Chocolate Temperature Game
I spent way too long learning that chocolate temperature is everything with this recipe. If it's too hot, it'll melt your marshmallows into puddles before the chocolate even sets. If it's too cool, it'll coat unevenly and look patchy instead of that smooth, professional finish you're aiming for. The sweet spot is when you can comfortably hold your finger in the melted chocolate for three full seconds without it burning—warm but not hot, and that's when you dip.
Timing and Storage
These bunnies are best assembled and served the same day, but they'll hold for about two days in an airtight container in the refrigerator if you need them for an actual Easter party weekend. I've left them out on the counter during a spring afternoon before, and the chocolate started getting soft and the marshmallows got a little droopy, so definitely stick them in the cold if you're not eating them right away. Think of them like they're taking a little rest, staying fresh until the moment someone picks them up and grins at how impossibly cute they are.
Make Them Uniquely Yours
The beauty of these strawberry bunnies is that they're a blank canvas for your personal touch and creativity. I've seen versions with chocolate chip eyes, versions with tiny fondant bow ties, versions where someone piped entire faces on with pure determination. You can swap the pink gel for blue, make them into chicks instead of bunnies, or go completely wild with edible glitter and sprinkles if that's your energy.
- Try using edible pearl dust mixed into melted white chocolate for a shimmery, elegant look that catches the light.
- If you're making these with kids, let them do the marshmallow placement and the eyes while you handle the chocolate dipping and drizzling.
- Keep a small bowl of warm water nearby to rinse your fingers between bunnies so the chocolate doesn't build up and make everything sticky.
 Save Pin
 Every Easter now, these little bunnies are the first thing my daughter asks about, and I've started making extra because somehow the family friends who stop by always end up with one in their hand. There's something about putting this much care into a dessert that makes people slow down and actually look at what they're about to eat instead of just diving in.
Recipe FAQs
- → Can I use other berries instead of strawberries?
Yes, firm berries like blueberries or raspberries can be used, but strawberries hold the decorations best.
- → How do I melt white chocolate without burning it?
Use a double boiler or microwave in short bursts, stirring frequently to ensure smooth melting.
- → What can I substitute for marshmallow ears?
Mini gummy candies or shaped fondant can be alternatives if marshmallows are unavailable or unwanted.
- → Can I prepare these in advance?
Yes, prepare and chill them several hours ahead, storing in the refrigerator to keep the coating firm.
- → Are there options for vegan-friendly chocolate?
Using dairy-free white and dark chocolates along with vegan marshmallows will make this treat vegan-friendly.